Tuesday Apr. 1, 2008
The Experiment #3 reports were collected
today. The controls
of temperature optional assignment was also due today. The humidity optional
assignment is due at the start of class on Thursday
The revised Expt. #2 reports have been graded and were returned in
class today.

There are lots of extra office hours this week. I'm thinking
ahead to next week's quiz. You really should be reviewing the
material on the Quiz #3 Study Guide that we have already covered.
Don't leave everything until next week, there is too much
material. If you're not doing as well in this class as you think
you should be you should come by my office hours and we will try to
figure out why that is the case.
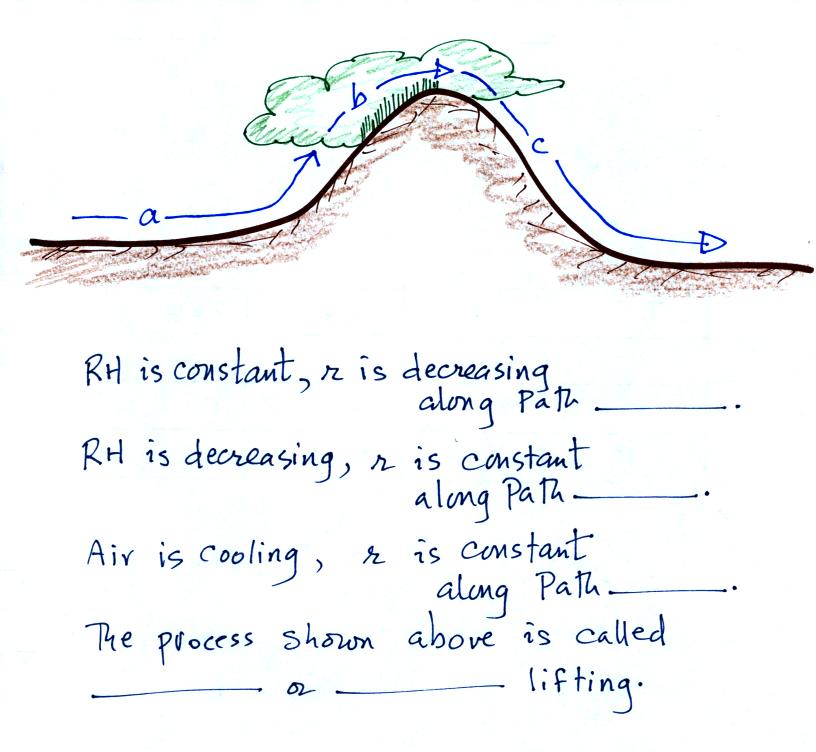
Here's a fairly tough humidity question that I put up on the screen at
the beginning of class. See if you know the answers to these
questions. If you don't then you might quickly review the
material on the study guide concerning humidity variables, drying moist
air, and the rain shadow effect (or read through the online
notes). You need to do that at some point before next week's
quiz. Once you think you understand that material a little bit
better then come back to this problem. You'll find the answers to
this question here.
Something
I forgot to mention last Thursday when discussing sling psychrometers
and measuring humidity.

You've felt the cooling when you step out of a pool on a warm dry
day.
You body tries to cool itself by perspiring during hot weather.
From
the text: "over ten million sweat glands wet the body with as much
as two liters of liquid per hour." When the relative humidity is
high, there might not be enough net evaporation to cool your
body. You might end up with heat stroke - a
potentially deadly
condition.
Just as wind and cold temperatures make it feel colder than it really
is,
a combination of high temperatures and high humidity make it feel
hotter than it is.
The wind chill temperature measures the effect of cold temperatures and
wind,
The heat index measures the effect of high temperatures and high
relative humidities.
Today we
will be learning how to identify and name clouds.
The ten main cloud types are listed below (you'll find this list on p.
95 in the photocopied class notes).
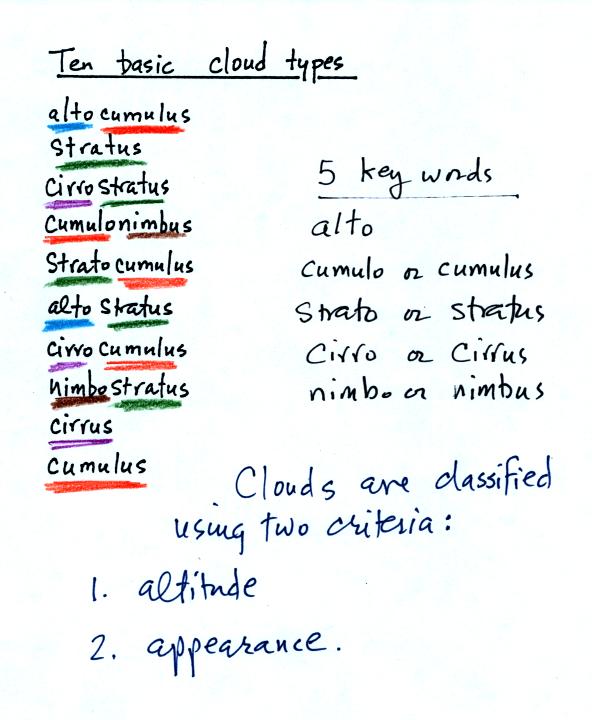
You should try to learn these 10 cloud names. Not just
because
they might be on a quiz (they will) but because you will be able to
impress your friends with your knowledge. There is a smart and a
not-so-smart way of learning these names. The not-so-smart way is
to just memorize them. You will inevitably get them mixed
up. A better way is to recognize that all the cloud names are
made up of key words. The key words, we will find, tell you
something about the cloud altitude and appearance.

Each of the clouds above has a box reserved for it in the figure
above. Drawing a figure like this on a blank sheet of paper is a
good way to review cloud identification and classification.
Clouds are classified according to the altitude at which
they form and
the appearance of the cloud. There are two key words for altitude
and two key words for appearance.

Clouds are grouped into one of three altitude categories: high, middle
level, and low.
Cirrus or cirro
identifies a high altitude cloud. There are three types of clouds
found in the high altitude category..
Alto in a cloud name means the
cloud is found at middle altitude.
The arrow connecting altostratus and nimbostratus indicates that
they are very similar. When an altostratus cloud begins to
produce rain or snow its name is changed to nimbostratus. A
nimbostratus cloud is also often somewhat thicker and lower than an
altostratus cloud.
It is very hard to just look
up in the sky and determine a cloud's altitude. You will need to
look for other clues to distinquish between high and middle altitude
clouds. We'll learn about some of the clues when we look at cloud
pictures later in the class.
There is no key word for low altitude clouds. Low
altitude clouds
have bases that form 2 km or less above the ground. The summit of
Mt. Lemmon in the Santa Catalina mountains north of Tucson is about 2
km above the valley floor. So low altitude clouds will have bases
that form at or below the summit of Mt. Lemmon.
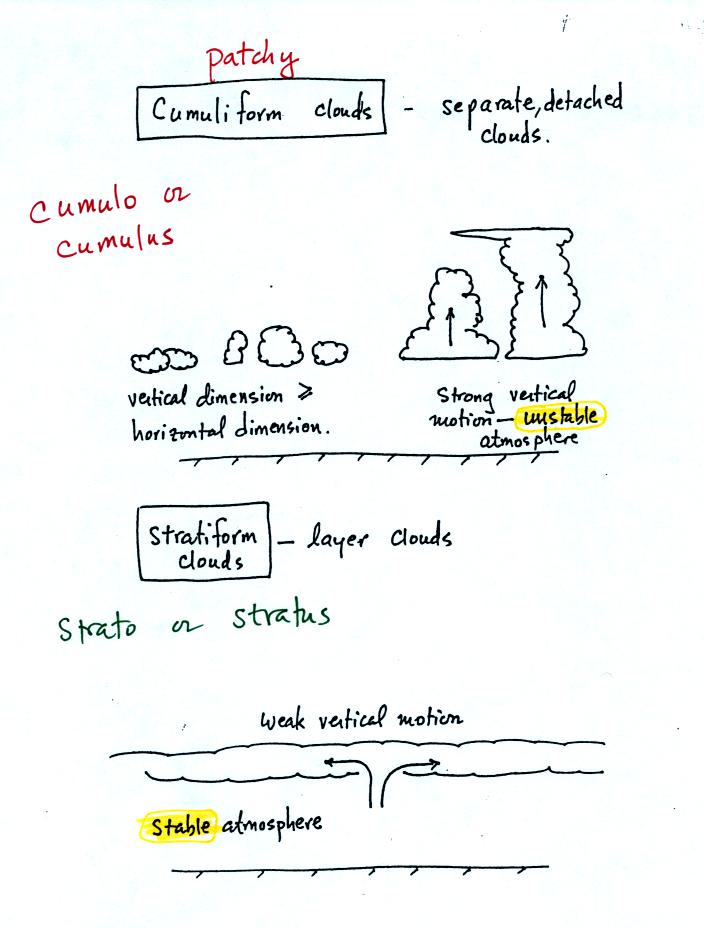
Now we will look at cloud appearance.
Clouds can have a patchy of puffy (or lumpy or wavy)
appearance. These are cumuliform clouds and will have cumulo or
cumulus in their
name. In an unstable atmosphere cumuliform clouds will grow
vertically.
Stratiform clouds grow horizontally and form layers. They form
when the atmosphere is stable.
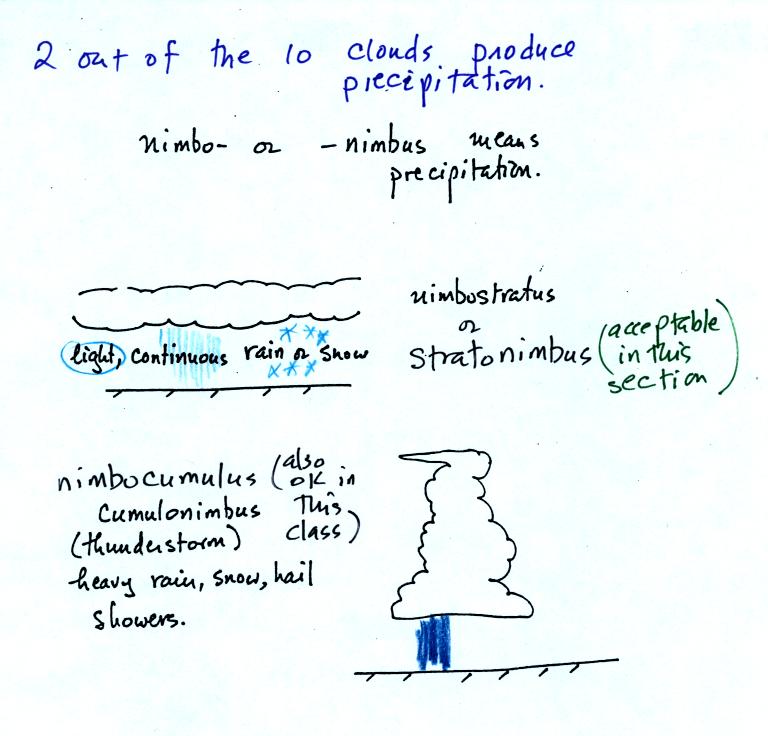
The last key word, nimbo or nimbus, means precipitation. Two of
the 10 cloud types are able to produce (significant amounts of)
precipitation.
Nimbostratus clouds tend to produce fairly light
precipitation over a large area. Cumulonimbus clouds produce
heavy showers over localized areas. Thunderstorm clouds can also
produce hail, lightning, and tornadoes. Hail would never fall
from a Ns cloud.
While you are still learning the cloud names you might put the correct
key words together in the wrong order (stratonimbus instead of
nimbostratus or nimbocumulus instead of cumulonimbus). You won't
be penalized for those kinds of errors in this class.
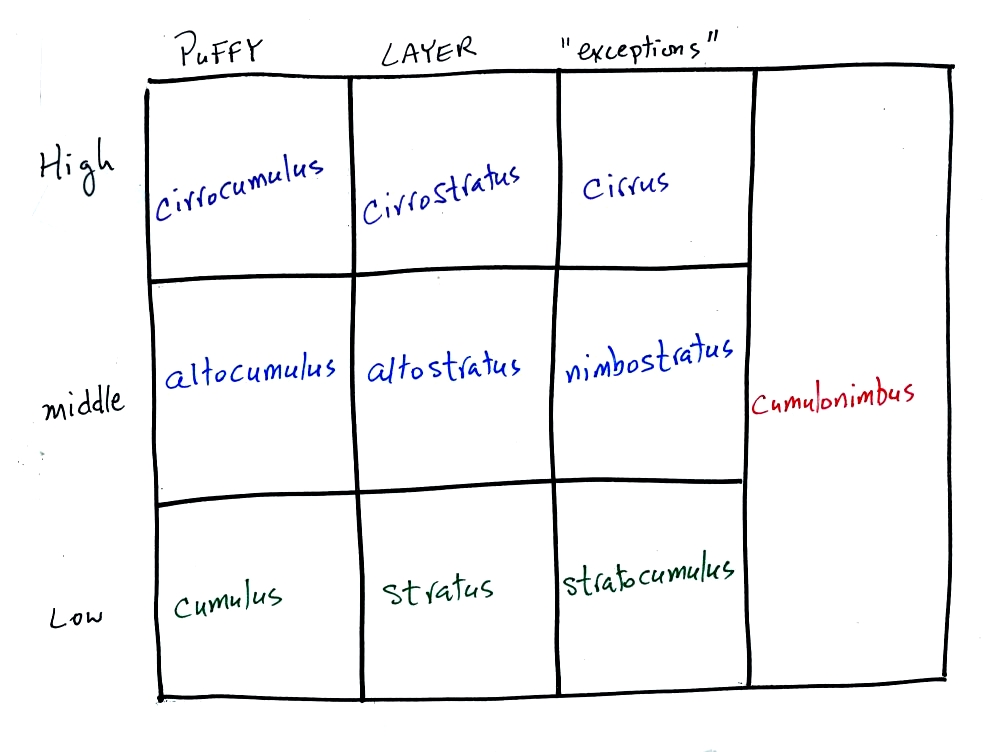
Here's the cloud chart from earlier. We've added the three
altitude categories along the vertical side of the figure and the two
appearance categories along the top. By the end of the class we
will add a picture to each of the boxes.
Next we
looked at 35 mm slides of most of the 10 cloud types.
Good
photographs of the ten cloud types can also be found in Chapter 4 of
the text and in a Cloud Chart at the end of the textbook. You'll
find the written descriptions of the cloud types in the images below on
pps 97-98 in the
photocopied notes.
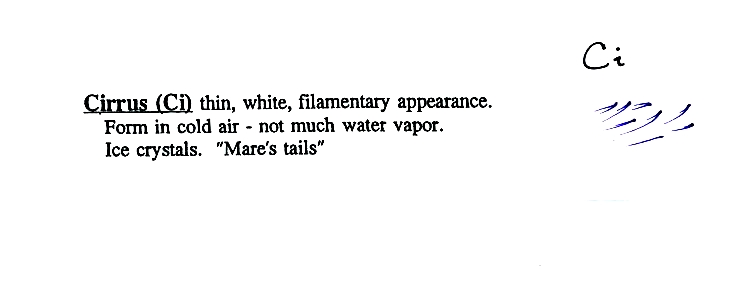
High altitude clouds are thin because the air at high
altitudes is
very cold and cold air can't contain much moisture (the saturation
mixing ratio for cold air is very small). These clouds are also
often blown around by fast high altitude winds. Filamentary means
"stringy" or "streaky". If you imagine trying
to paint a Ci cloud you would dip a stiff
brush in white paint brush it quickly and lightly across a blue colored
canvas.
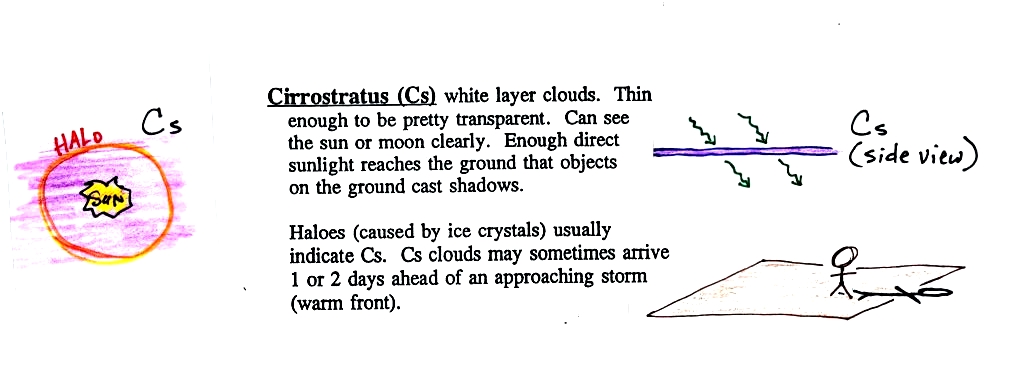
A cirrostratus cloud is a thin uniform white layer
cloud
(not purple as shown in the figure) covering
part or all of the sky. Here you might first dilute your white
paint with water and then
brush back and forth across the canvas. The thin white paint
might not be thick enough to hide the blue canvas but the white coating
on the canvas would be uniform not streaky like with a cirrus cloud.
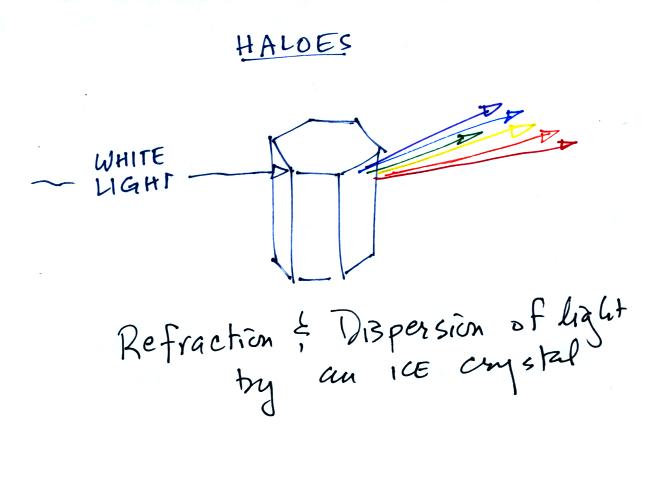
White light entering a 6 sided ice crystal is bent
(refraction). The amount of bending depends on the color
(wavelength) of the light (dispersion). The white light is split
into colors just as light passing through a glass prism. This
particular crystal is called a column and is fairly long.
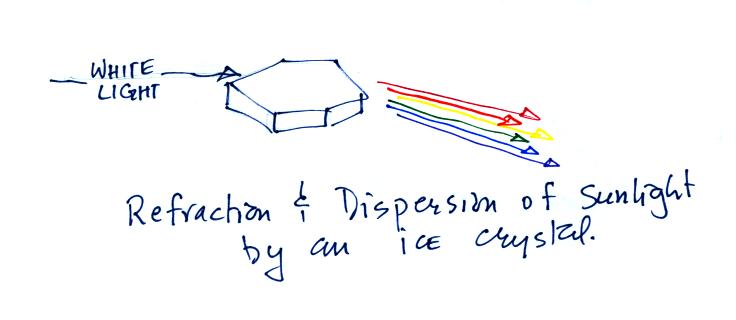
This is a flatter crystal and is called a plate. These
crystals tend to all be horizontally oriented and produce
sundogs. A sketch of a sundog is shown below.
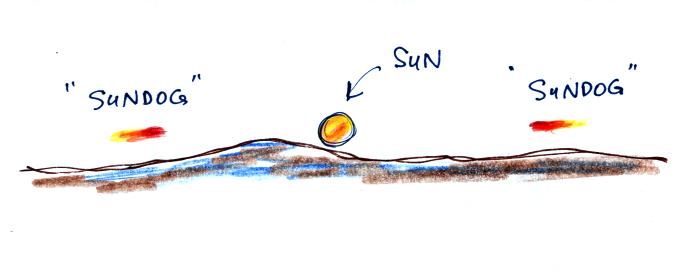
Sundogs are pretty common and are just patches of light seen to
the right and left of the rising or setting sun.
Cirrus and cirrostratus clouds are fairly common. Cirrocumulus
clouds are a little more unusual.

To paint a Cc cloud you would dip a sponge in white paint
and
press it gently against the canvas. You would leave a patchy,
splotchy
appearing cloud (sometimes you might see small ripples). It is
the patchy (or wavy) appearance that makes
it a cumuliform cloud.
If you spend enough time outside looking, you will see all of
these types of clouds.
Though, it's like wild animals, some are much more common than others.
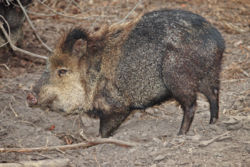
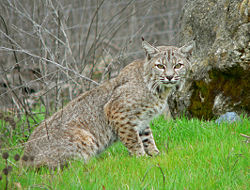
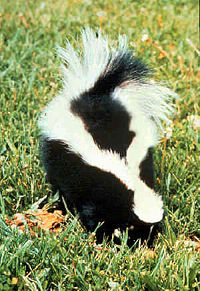
Here are some animals that you are likely to see outdoors in the
Tucson area. Coyotes and javelina are pretty common.
Bobcats and skunks are a little less common. I'm not sure why I
put this in the online notes, it was just an impulse.

Altocumulus clouds are pretty common. Note since it is hard
to accurately judge altitude, you must
rely
on cloud element size to determine whether a cloud belongs in the high
or middle altitude category. The cloud elements in Ac clouds
appear larger than in Cc because the cloud is closer to the ground.
Lenticular clouds (see Fig. 4.33 on p. 105 in the text) are a special
type of altocumulus cloud.

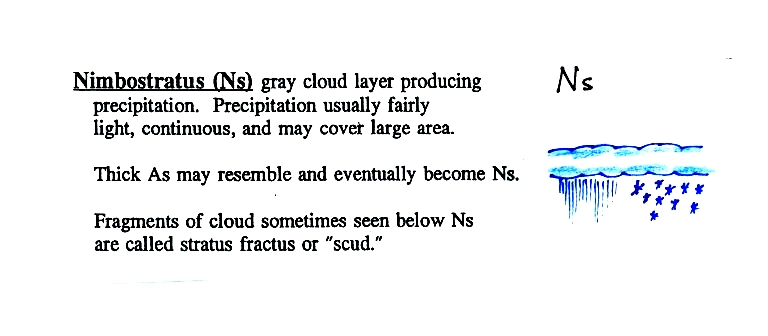
When (if) an
altostratus cloud begins to produce precipitation, its name is changed
to nimbostratus.
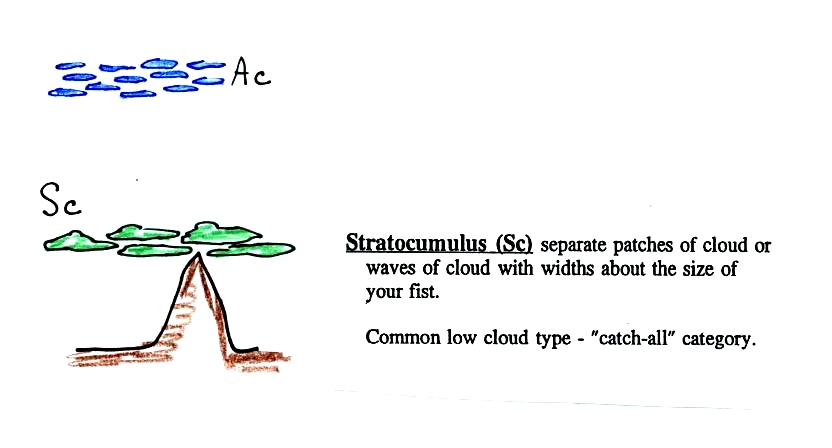
This cloud name is a little unusual because the two key
words for cloud
appearance have been combined. Because they are closer to the
ground, the separate patches of Sc are about fist size. The
patches of Ac, remember, were about thumb nail size.
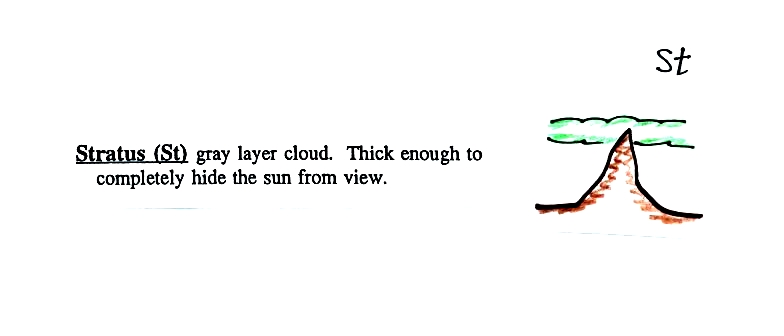
No pictures of stratus clouds were shown in class.
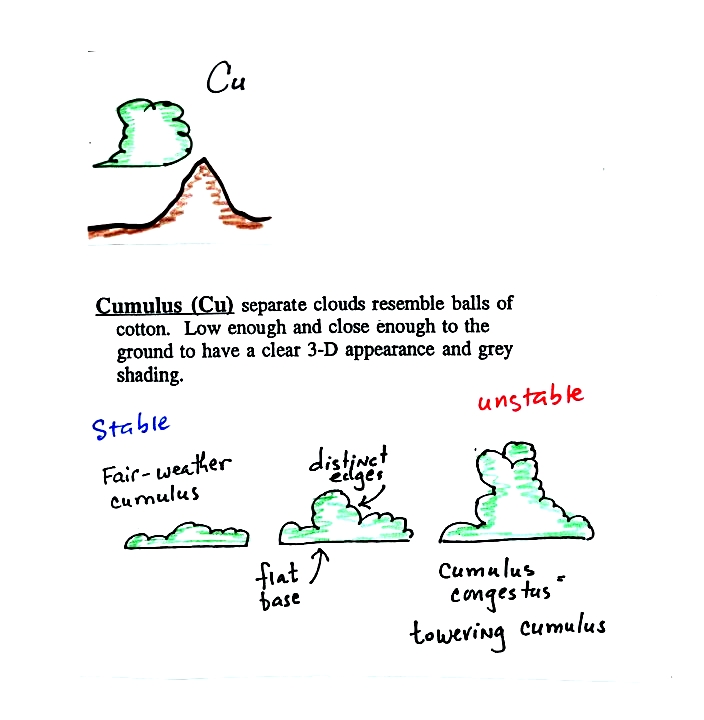
Cumulus clouds come with different degrees of vertical
development. The fair weather cumulus clouds don't grow much
vertically at all. A cumulus congestus cloud is an intermediate
stage between fair weather cumulus and a thunderstorm.
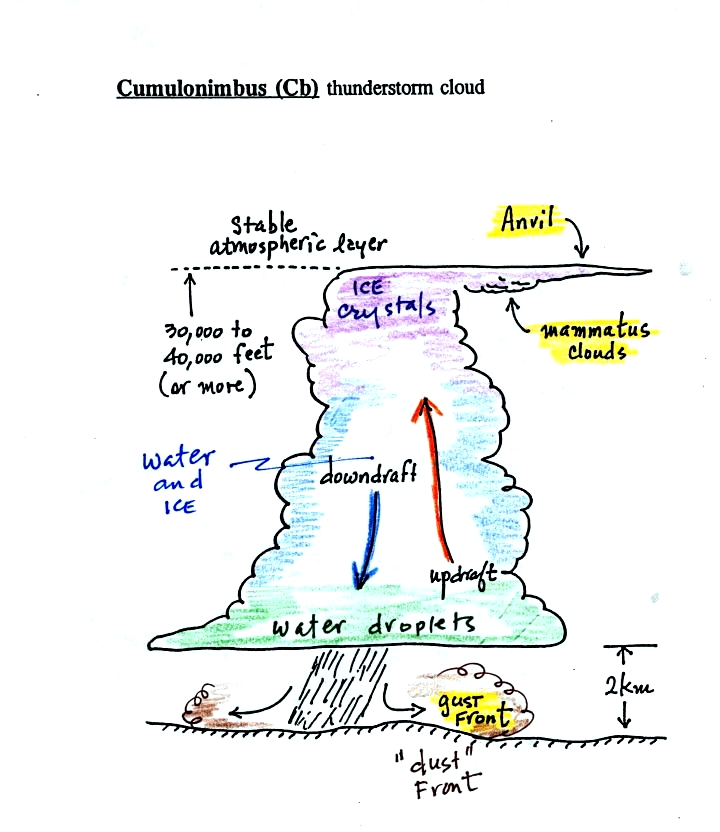
There are lots of distinctive features on cumulonimbus
clouds including the flat anvil top and the lumpy mammatus clouds
sometimes found on the underside of the anvil. Cold dense
downdraft winds hit the ground below a thunderstorm and spread out
horizontally underneath the cloud. The leading edge of these
winds produces a gust front. Winds at the ground below a
thunderstorm can exceed 100 MPH, stronger than many tornadoes.
The top of a thunderstorm is cold enough that it will be composed of
just ice crystals. The bottom is composed of water
droplets. In the middle of the cloud both water
droplets and ice crystals exist together at temperatures below freezing
(the water droplets have a hard time freezing). Water and ice can
also be found together in nimbostratus clouds. We will see that
this mixed phase region of the cloud is important for precipitation
formation. It is also where the electricity that produces
lightning is generated.
Here's one final feature to look for at the bottom of a
thunderstorm.
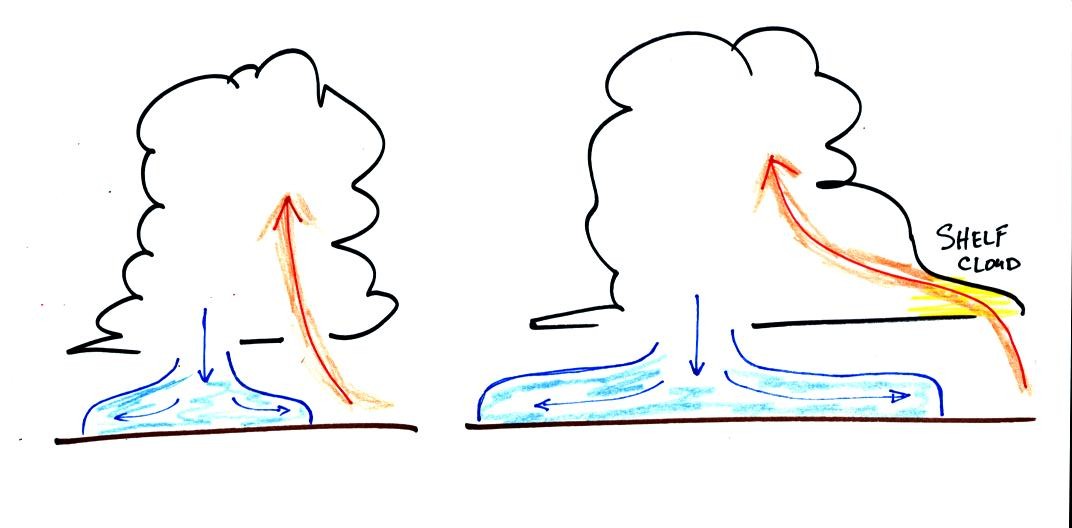
Cold air spilling out of the base of a thunderstorm is just
beginning
to move outward from the bottom center of the storm in the picture at
left. In the picture at right the cold air has moved further
outward and has begun to get in the way of the updraft. The
updraft is forced to rise earlier and a little ways away from the
center of the thunderstorm. Note how this rising air has formed
an extra lip of cloud. This is called a shelf cloud. You'll
find a good photograph of a shelf cloud in Fig. 10.7 in the text.
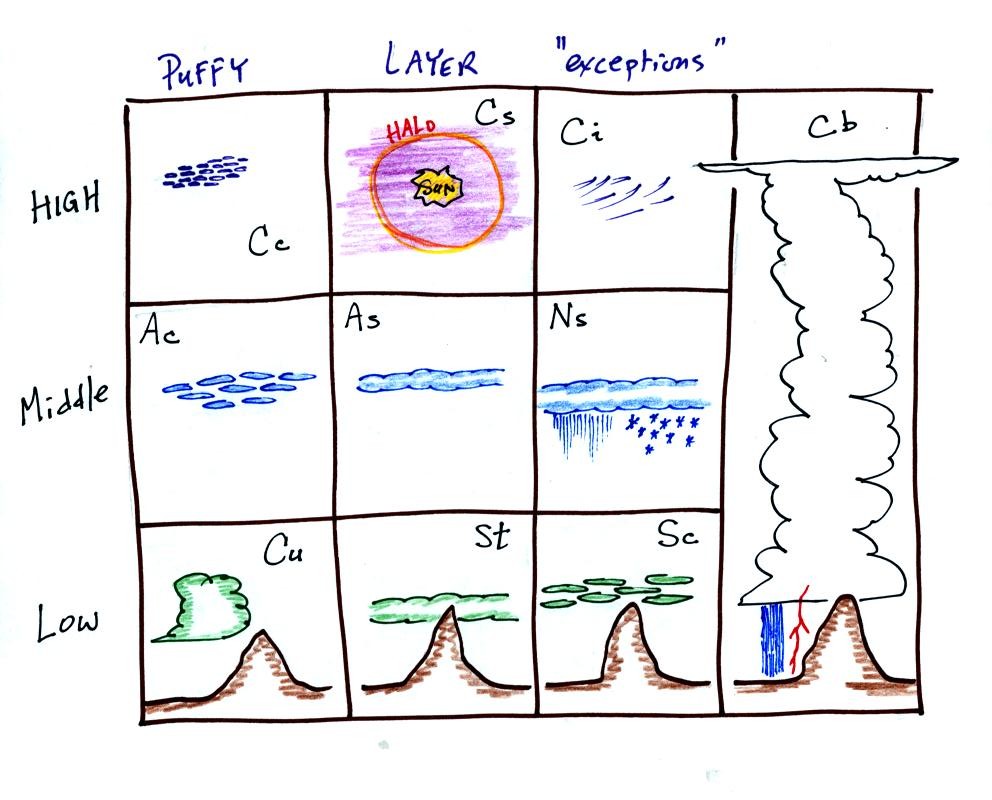
Here's our completed cloud chart with sketches of each of the
cloud types (cloud name abbreviations are shown here, rather than the
full cloud name).
We finished the class with a
quick look at the time and effort required to create a
thunderstorm. The following detailed discussion was intended to
prepare you and allow you to better appreciate a time lapse video movie
of a thunderstorm developing over the Catalina mountains. I don't
expect you to remember all of the details given below. The
figures below are more carefully versions of what was done in class.
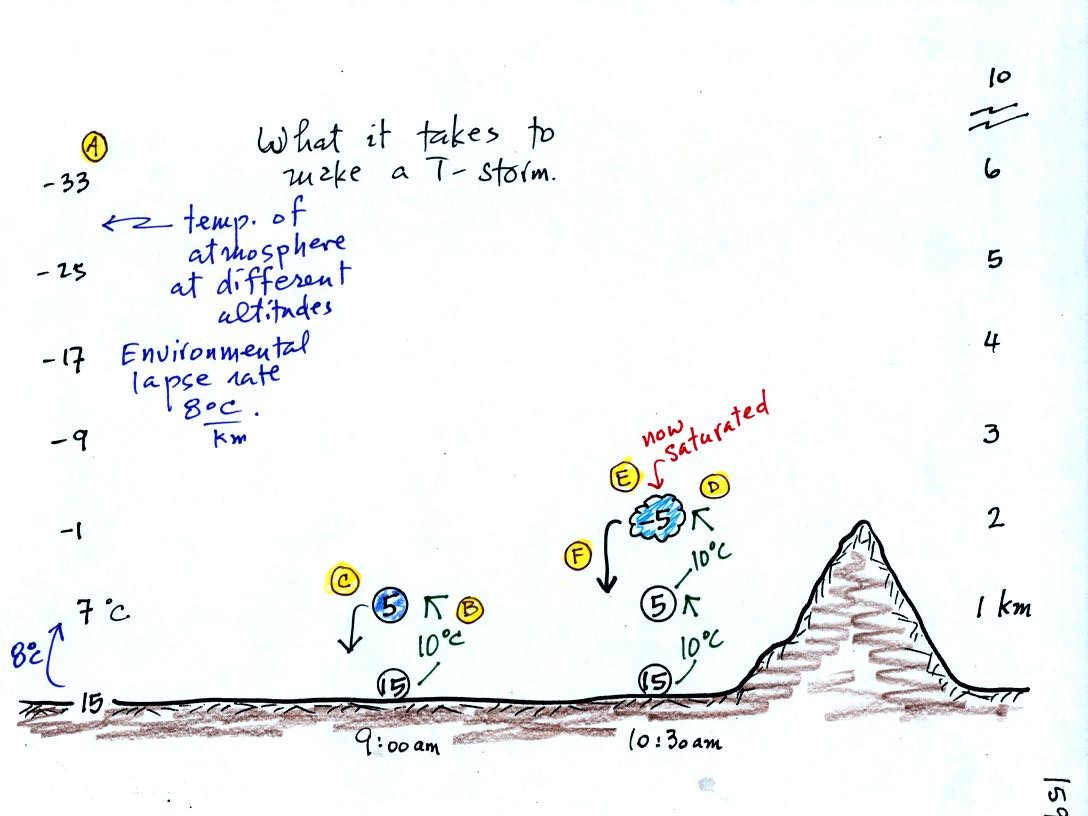
Refer back and forth between the lettered points in the
figure
above and the commentary below.
The numbers in Column A
show the temperature of the air in the atmosphere at various altitudes
above the ground (note the altitude scale on the right edge of the
figure). On this particular day the air temperature was
decreasing at a rate of 8 C per kilometer. This rate of decrease
is referred to as the environmental lapse rate. Temperature could
decrease more quickly than shown here or less rapidly.
Temperature in the atmosphere can even increase with increasing
altitude
(a temperature inversion).
At Point B, some of
the surface air is put into an imaginary container, a parcel.
Then a meterological process of some kind lifts the air to 1 km
altitude (in Arizona in the summer, sunlight heats the ground and air
in contact with the ground, the warm air becomes bouyant). The
rising air will expand and cool as it is
rising. Unsaturated (RH<100%) air cools at a rate of 10 C per
kilometer. So the 15 C surface air will have a temperature of 5 C
once it arrives at 1 km altitude.
At Point C note that
the air inside the parcel is slightly colder than the air outside (5 C
inside versus 7 C outside). The air inside the parcel will be
denser than the air outside and, if released, the parcel will sink back
to the
ground.
By 10:30 am the parcel is being lifted to 2 km as shown at Point D. It is still
cooling 10 C for every kilometer of altitude gain. At 2 km, at Point E the
air has cooled to its dew point temperature and a cloud has
formed. Notice at Point
F, the air in the parcel or in the cloud (-5 C) is still colder
and denser than the surrounding air (-1 C), so the air will sink back
to the ground and the cloud will disappear. Still no thunderstorm
at this point.
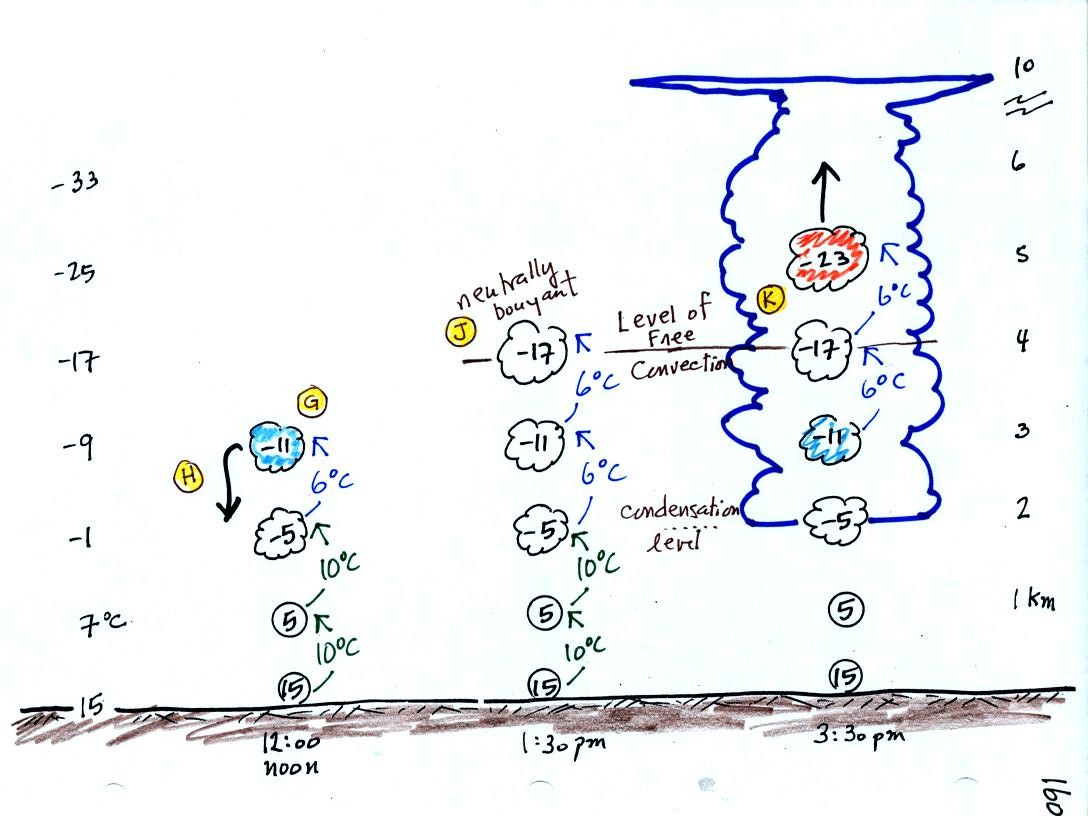
At noon, the air is lifted to 3 km. Because the
air
became saturated at 2 km, it will cool at a different rate
between 2 and
3 km altitude. It cools at a rate of 6 C/km instead of 10
C/km. The saturated air cools more slowly because release of
latent heat
during condensation offsets some of the cooling due to
expansion. The air that arrives at 3km, Point H, is again still
colder than the
surrounding air and will sink back down to the surface.
By 1:30 pm the air is getting high enough that it becomes neutrally
bouyant, it has the same temperature and density as the air around it
(-17 C inside and -17 C outside). This is called the level of
free convection, Point J in the figure.
If you can, somehow or another, lift air above the level of free
convection it will find itself warmer and less dense than the
surrounding air as shown at Point K and will float upward to the top of
the troposphere on its own. This is really the
beginning of a thunderstorm. The thunderstorm will grow upward
until it reaches very stable air at the bottom of the stratosphere.

